

Configuring Ingestion Controls for Connectors & Datasets
You now have more visibility and control over how your data syncs, at both the connector and dataset level. Whether you're managing sync schedules, adjusting how far back data is pulled, or fine-tuning chunking behavior, these controls give you the flexibility to configure data ingestion the way your accounts need it.
Connector-Level Configuration
From the main connector page, you can configure ingestion settings that apply to all datasets under that connector by default.
Max Days per Request (Chunk Size)
The Max Days per Request (Chunk Size) setting controls how many days of data are requested from the provider in a single API call. This can be useful for managing large data volumes or working with providers that have specific rate limits.
To set the chunk size at the connector level:
- Navigate to Data Cloud → Connectors
- Select the connector you want to configure
- Select Edit
- Locate the Max Days per Request (Chunk Size) setting
- Enter the desired number of days per request
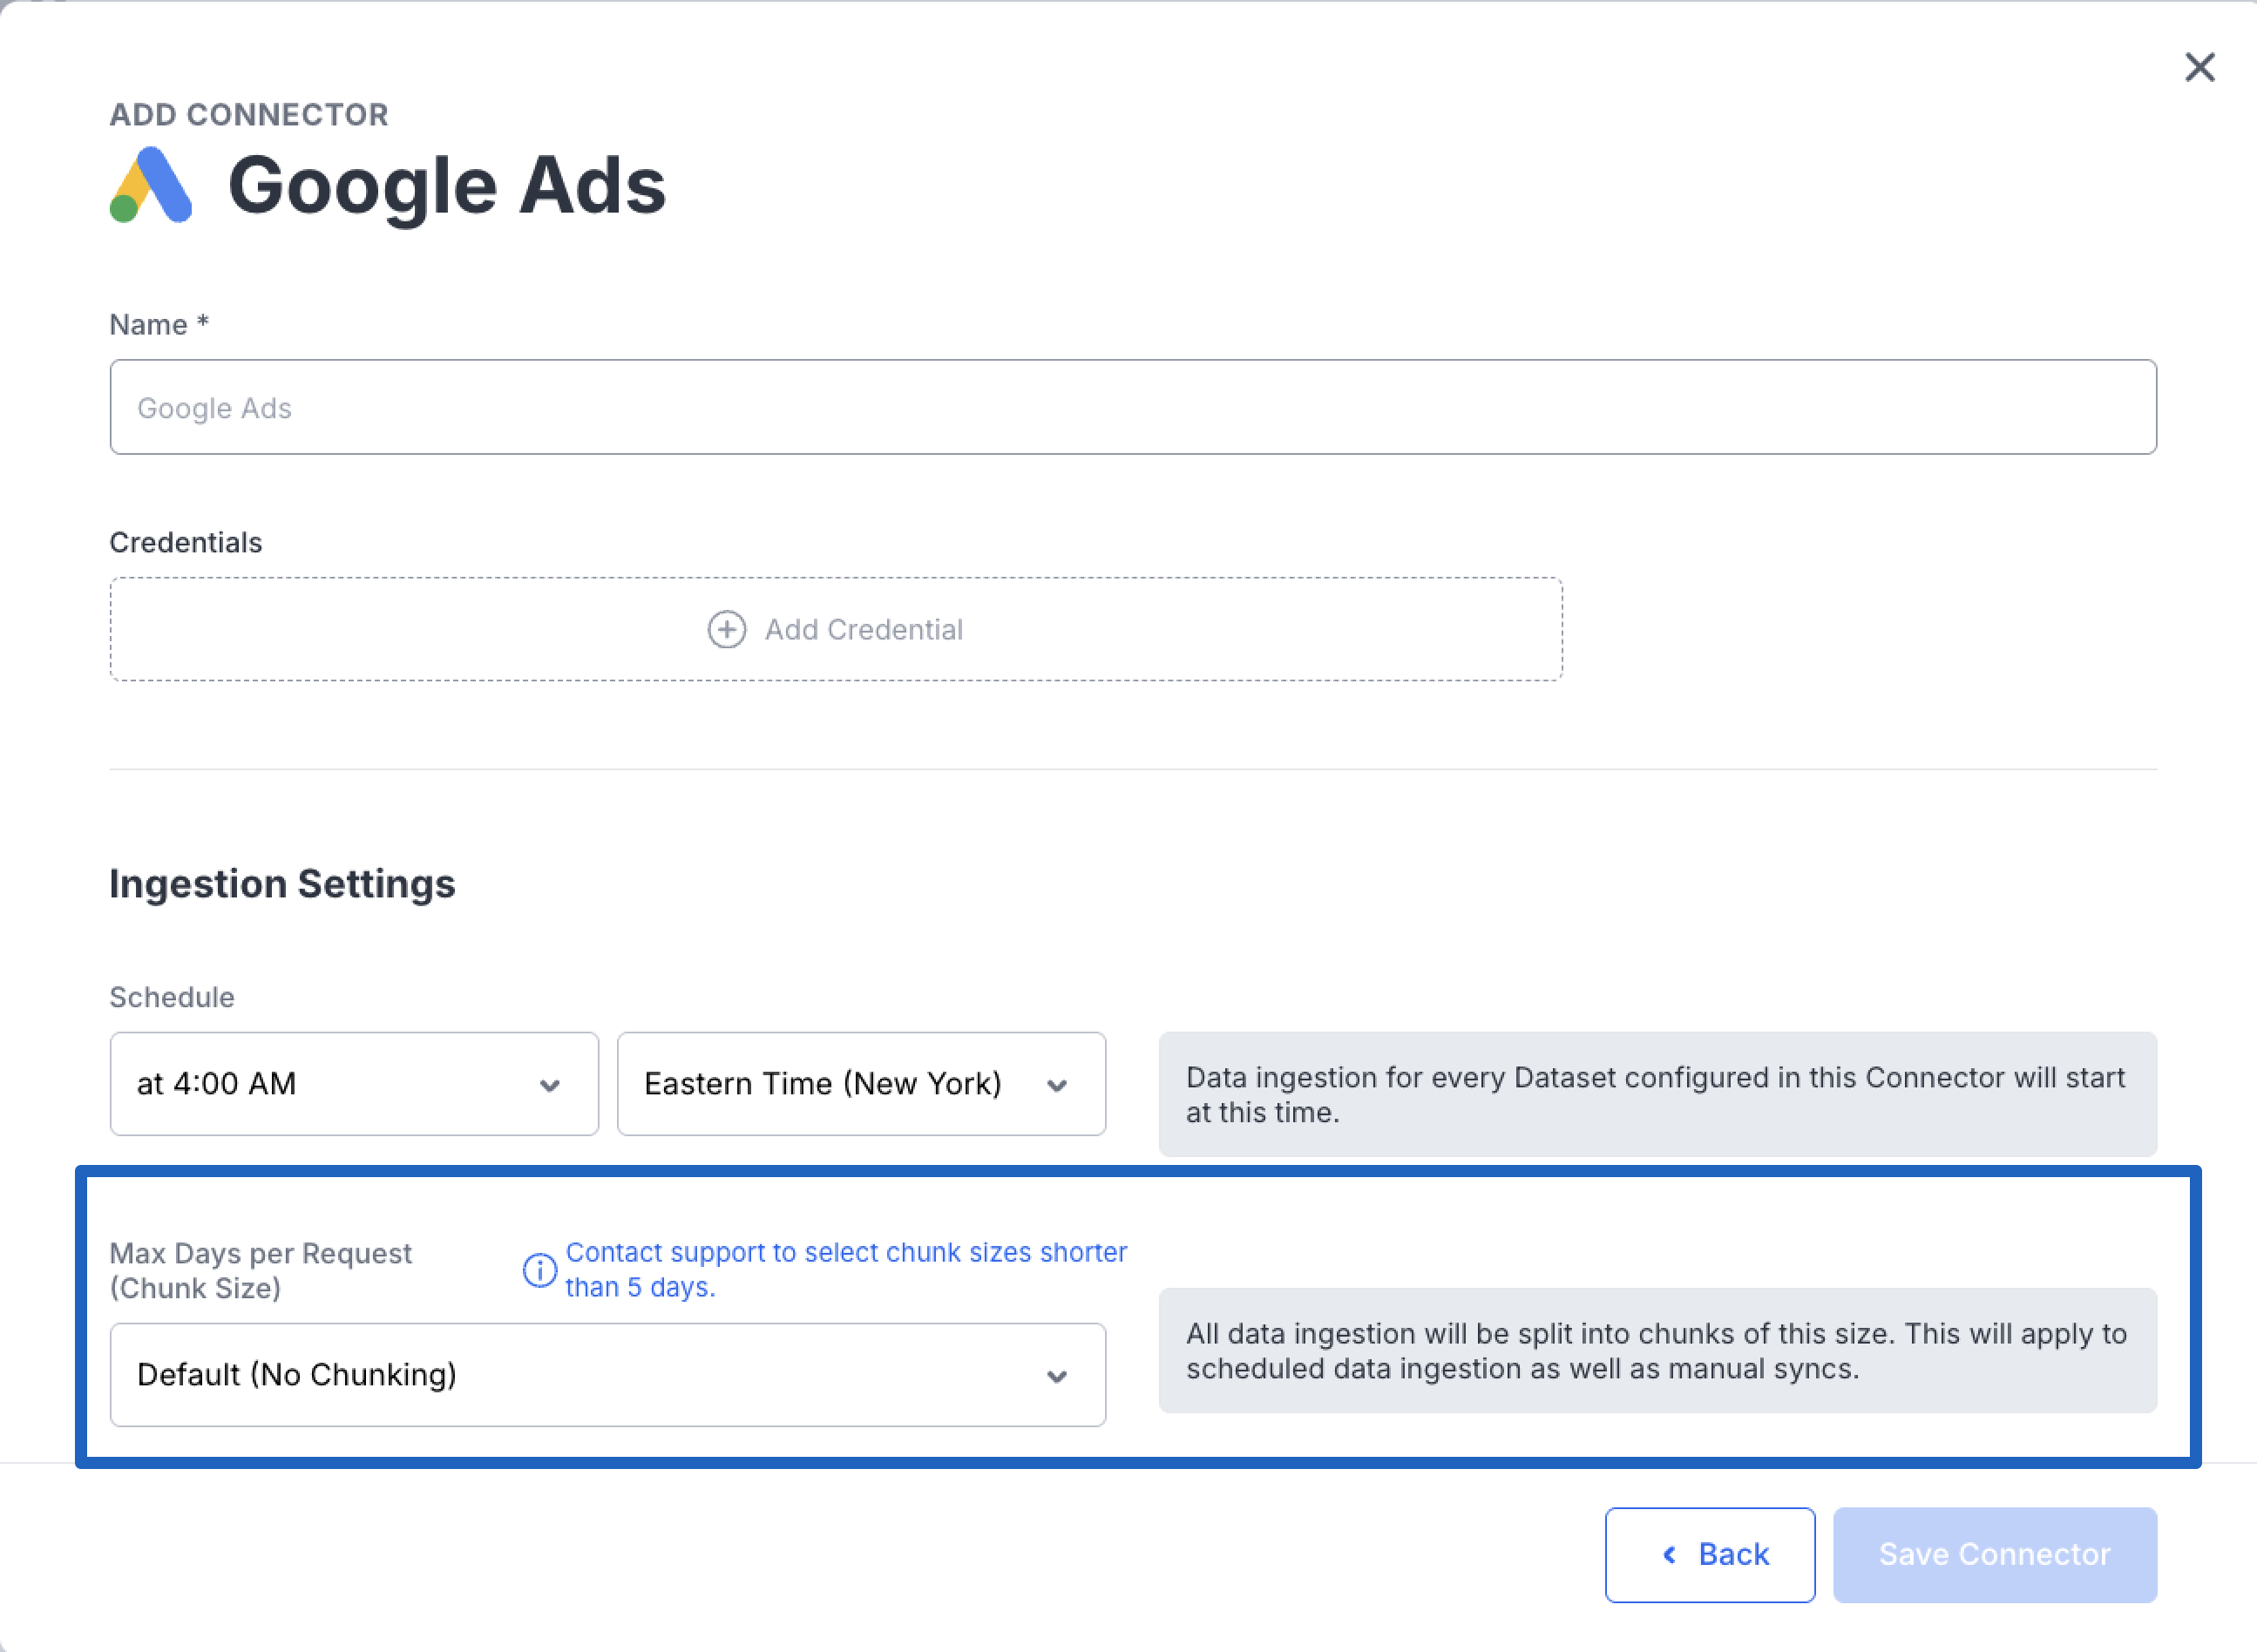
GuardrailsA minimum chunk size of 5 days is enforced to prevent configurations that could cause data sync issues. If your use case requires a chunk size smaller than 5 days, please contact NinjaCat Support.
Dataset-Level Overrides
If a specific dataset needs different ingestion settings than its parent connector, you can override both the refresh lookback window and the chunk size independently at the dataset level.
Overriding Refresh Lookback Window
The refresh lookback window controls how far back NinjaCat re-pulls data during each sync. Overriding this at the dataset level lets you fine-tune how much historical data is refreshed for a particular dataset without affecting other datasets on the same connector.
To override the lookback window for a dataset:
- Navigate to Data Cloud → Connectors
- Select the connector containing the dataset
- Select "Edit Connection" on the dataset you want to configure
- Locate the Refresh Lookback Window override setting
- Enter the desired lookback window value
Overriding Chunk Size
Similarly, you can override the chunk size for a specific dataset if it requires a different configuration than what's set at the connector level.
To override the chunk size for a dataset:
- Navigate to Data Cloud → Connectors
- Select the connector containing the dataset
- Open the dataset you want to configure
- Locate the Max Days per Request (Chunk Size) override setting
- Enter the desired chunk size
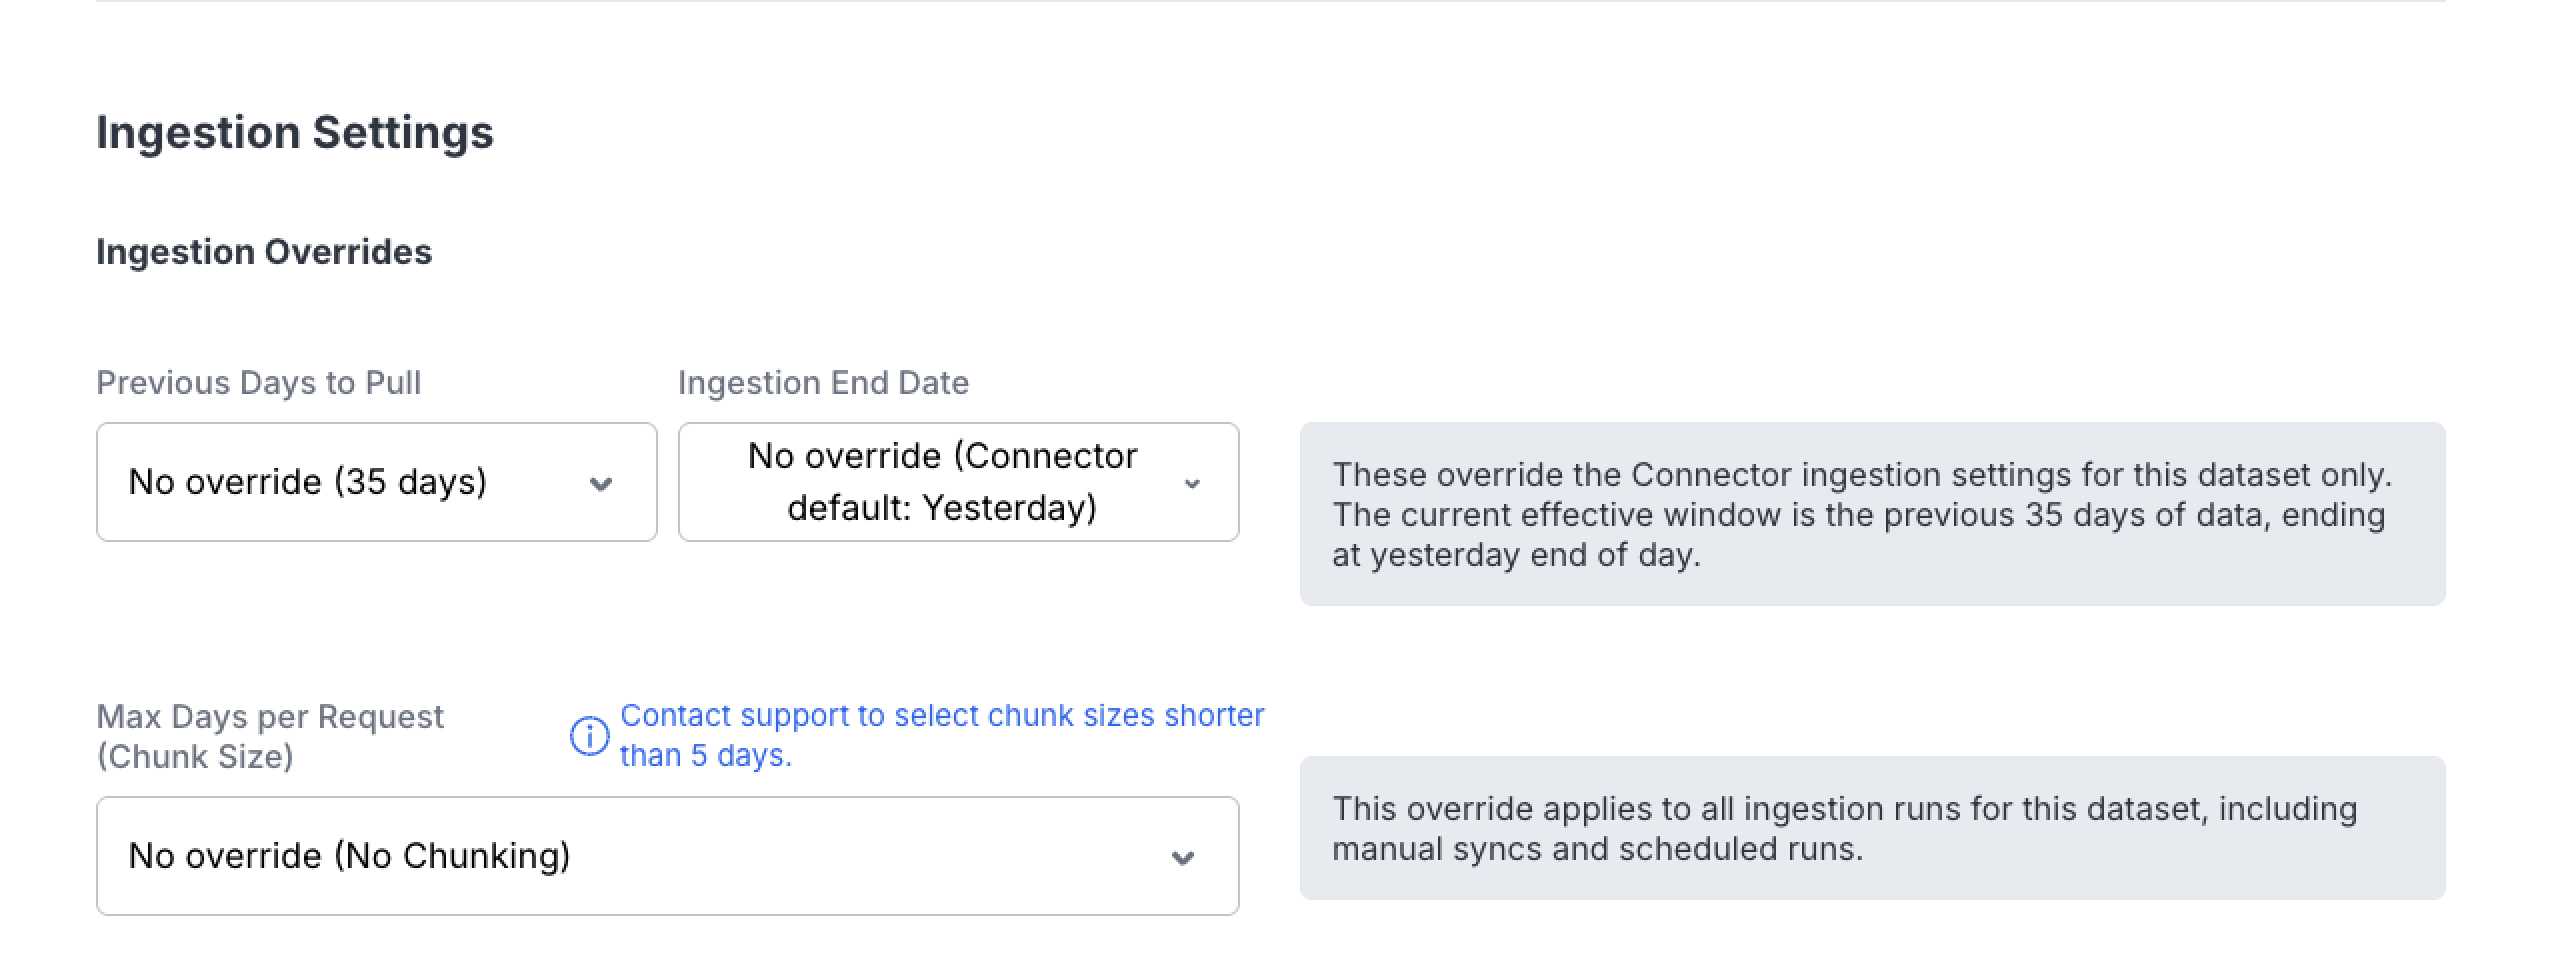
Same Guardrails ApplyThe same minimum 5-day chunk size requirement applies to dataset-level overrides. Contact NinjaCat Support if you need a value below this threshold.
Dataset Scheduling Options
You now have three distinct scheduling options for your datasets, giving you full control over when your data syncs.
Option 1: Use the Connector Schedule
By default, datasets will sync on the connector's existing schedule. No additional configuration is needed — the dataset automatically follows the sync cadence set at the connector level. In this case the "Add Schedule (Optional) toggle will NOT be selected.
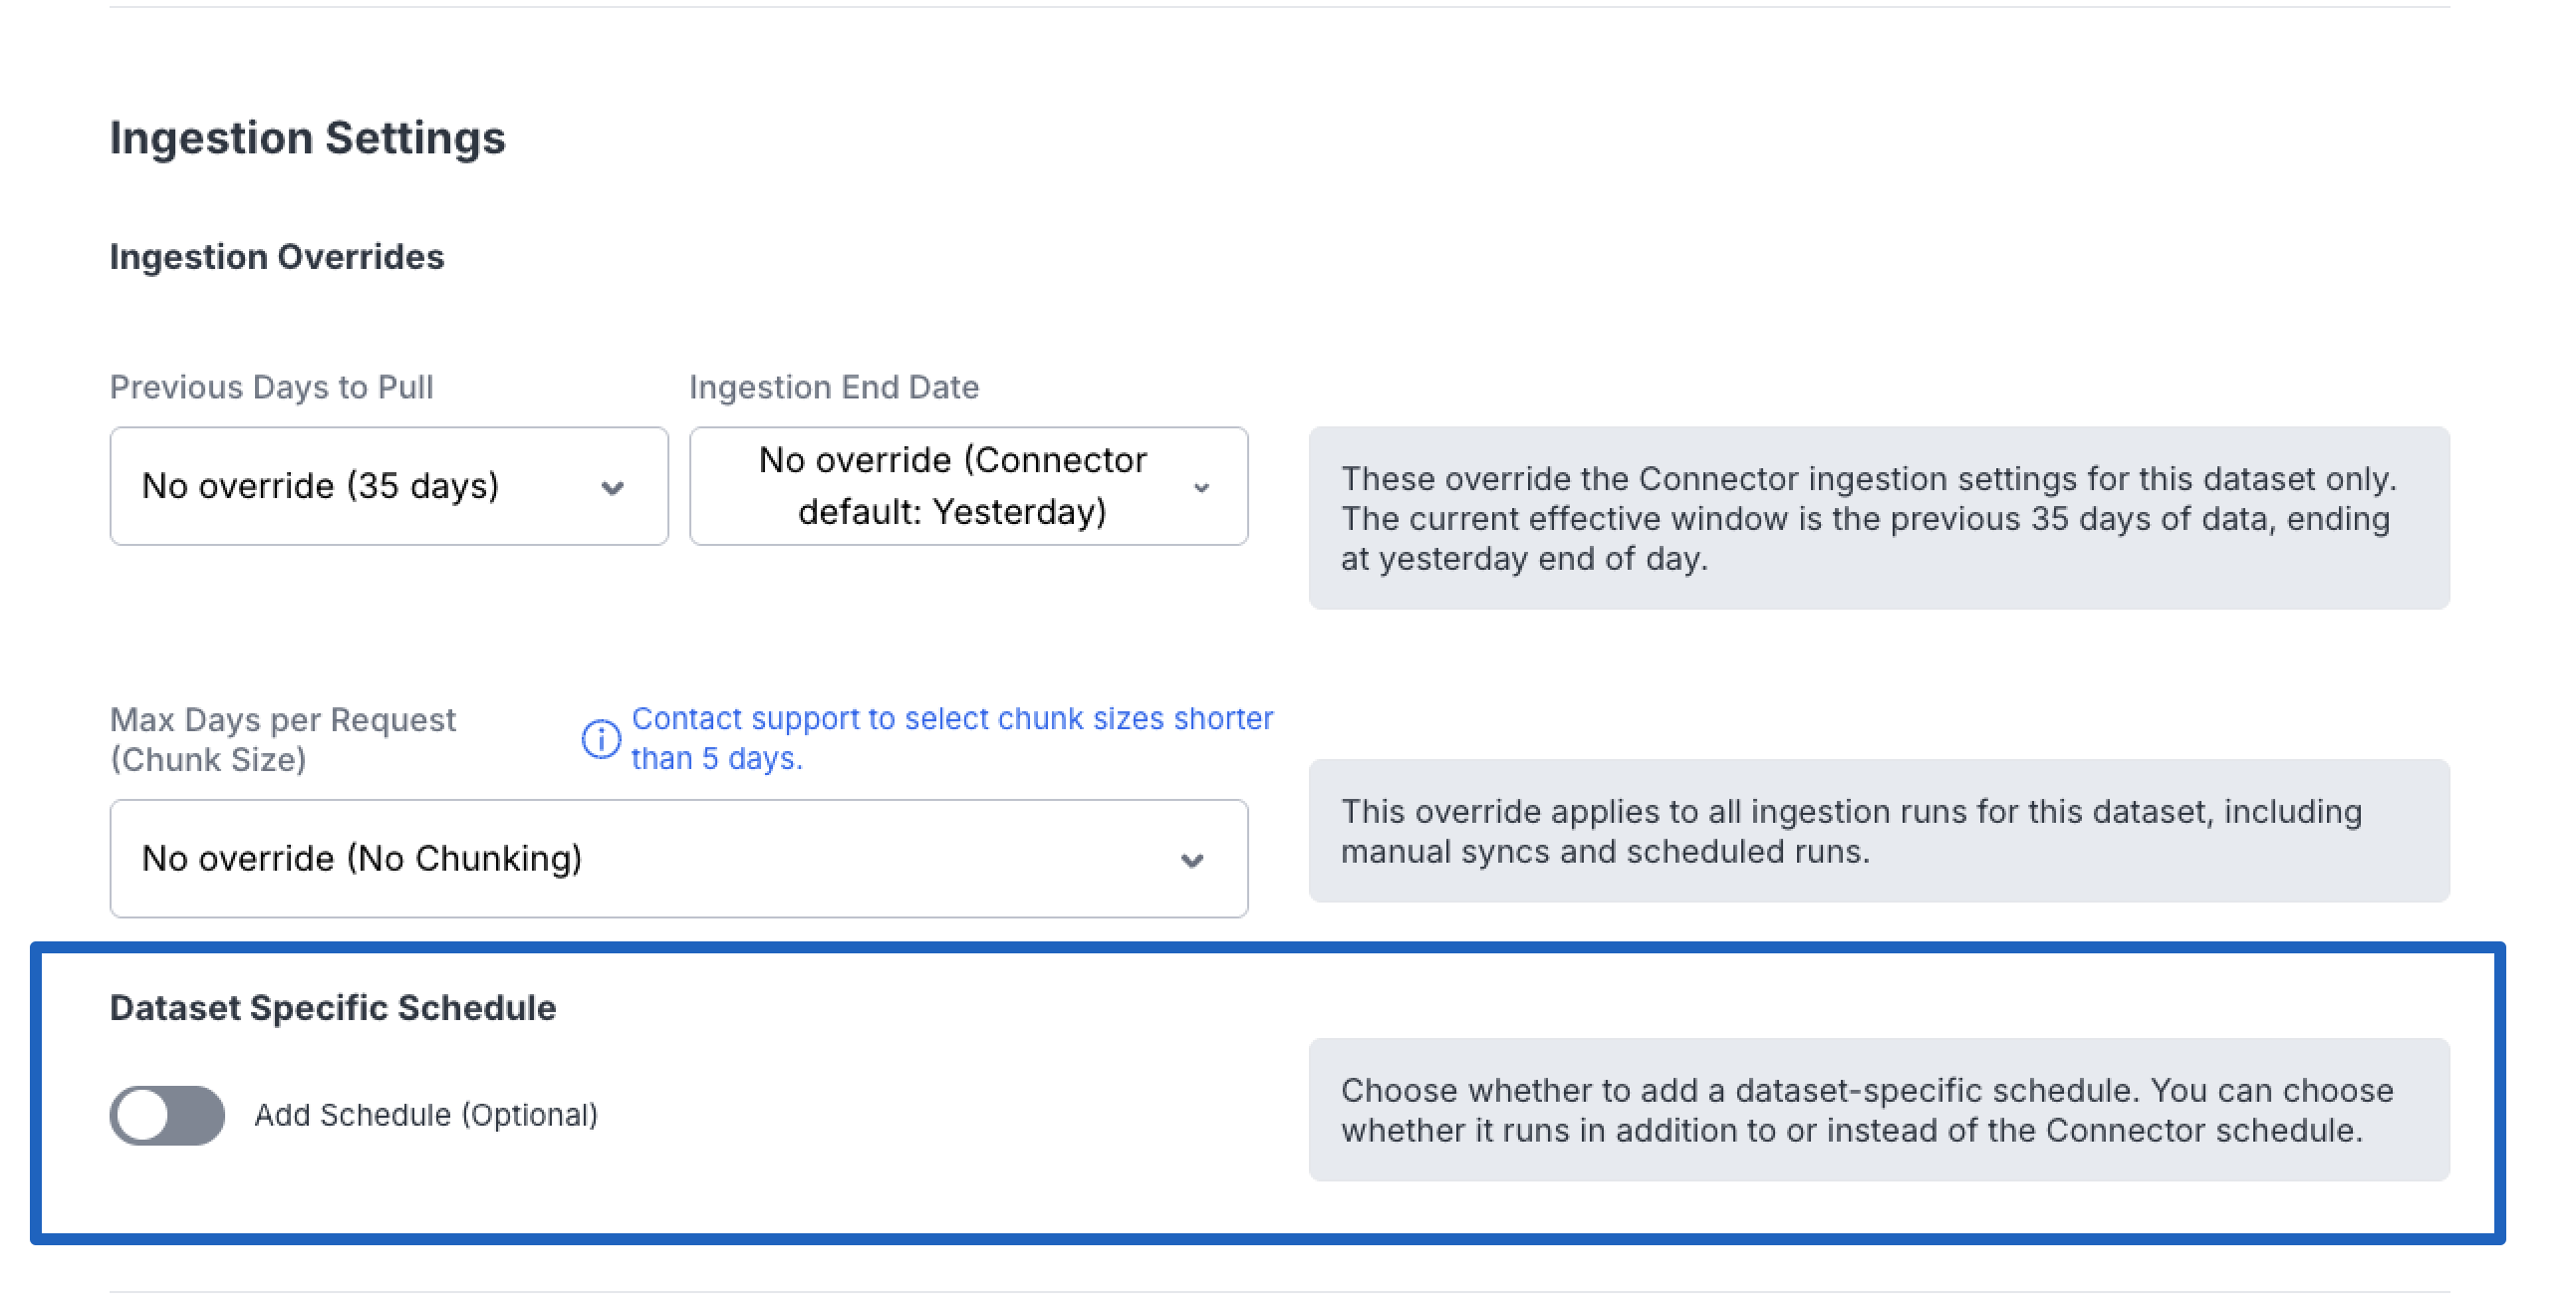
Option 2: Add an Additional Schedule
Select "Add Schedule (Optional)" to configure an additional sync time that runs in addition to the connector schedule. This is useful when you need more frequent data refreshes for a particular dataset.
To add an additional schedule:
- Navigate to Data Cloud → Connectors
- Select the connector containing the dataset
- Open the dataset you want to configure
- Click "Add Schedule (Optional)"
- Configure the desired sync time and frequency
- Choose Additional as the Schedule Behavior option
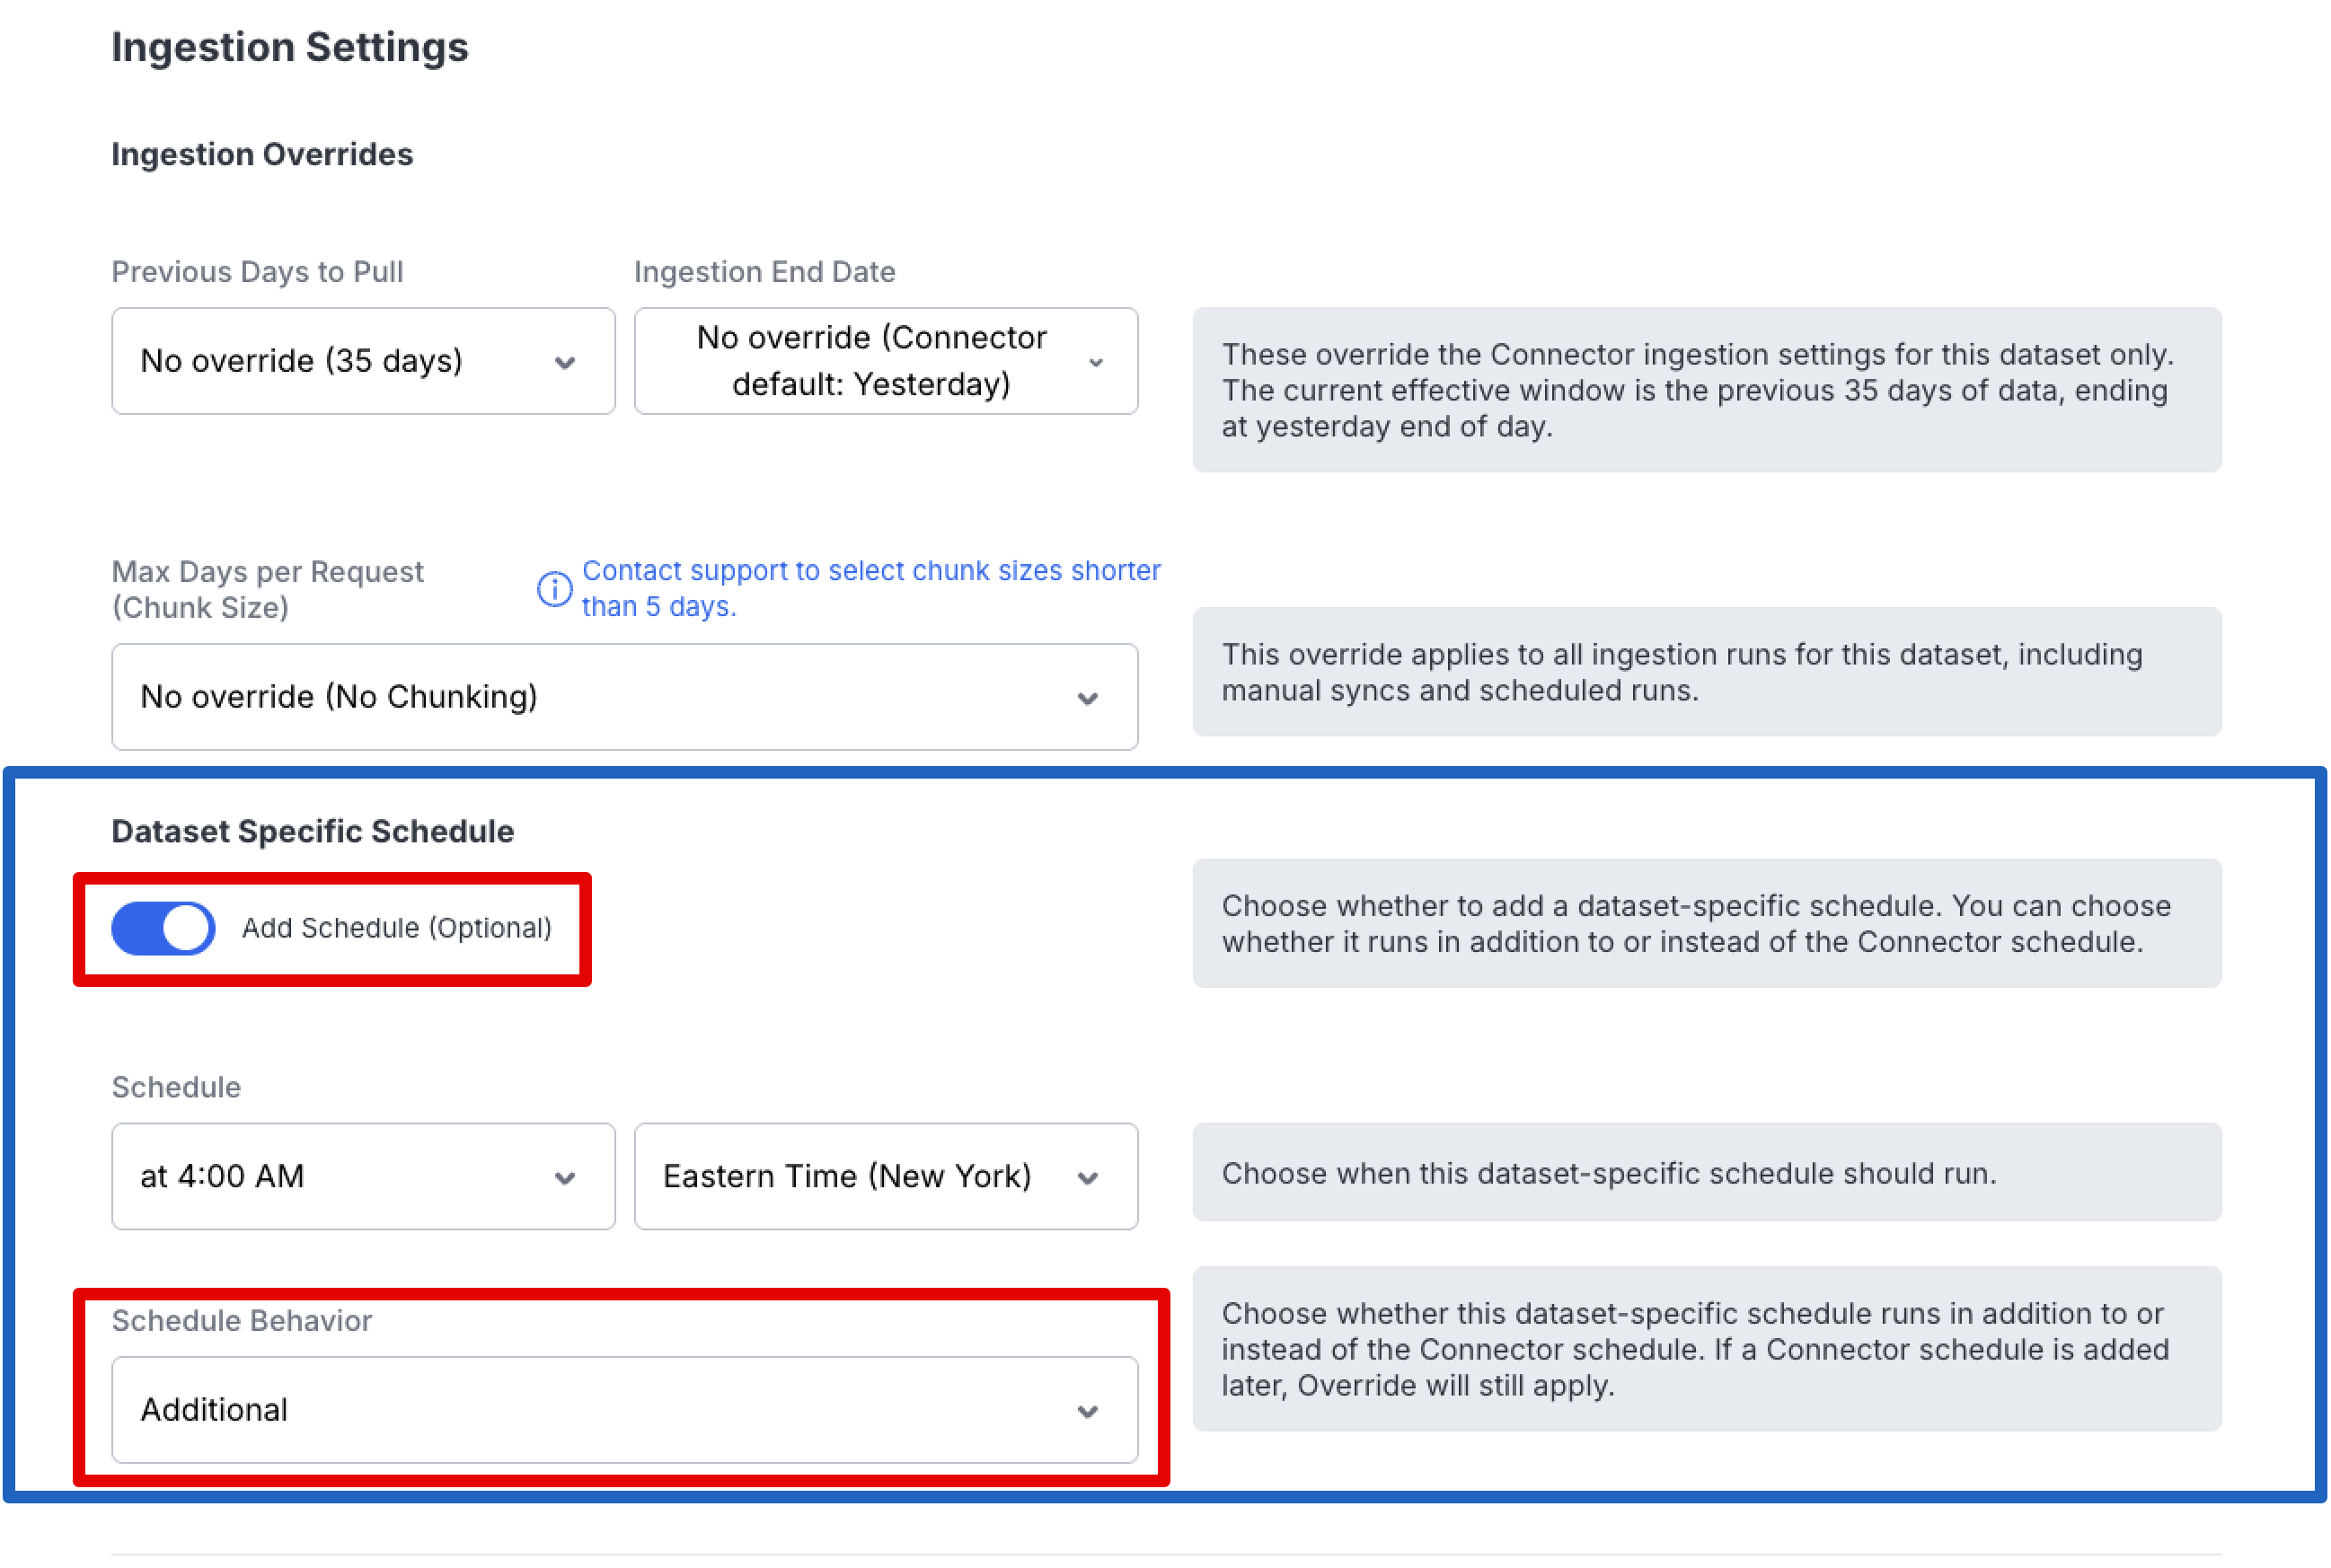
Option 3: Override the Connector Schedule
When adding a schedule, you can also choose to override the connector schedule entirely. This replaces the connector-level schedule for that specific dataset, giving you full independent control over when it syncs.
To override the connector schedule:
- Navigate to Data Cloud → Connectors
- Select the connector containing the dataset
- Open the dataset you want to configure
- Click "Add Schedule (Optional)"
- Configure the desired sync time and frequency
- Choose "Override as the Schedule Behavior option
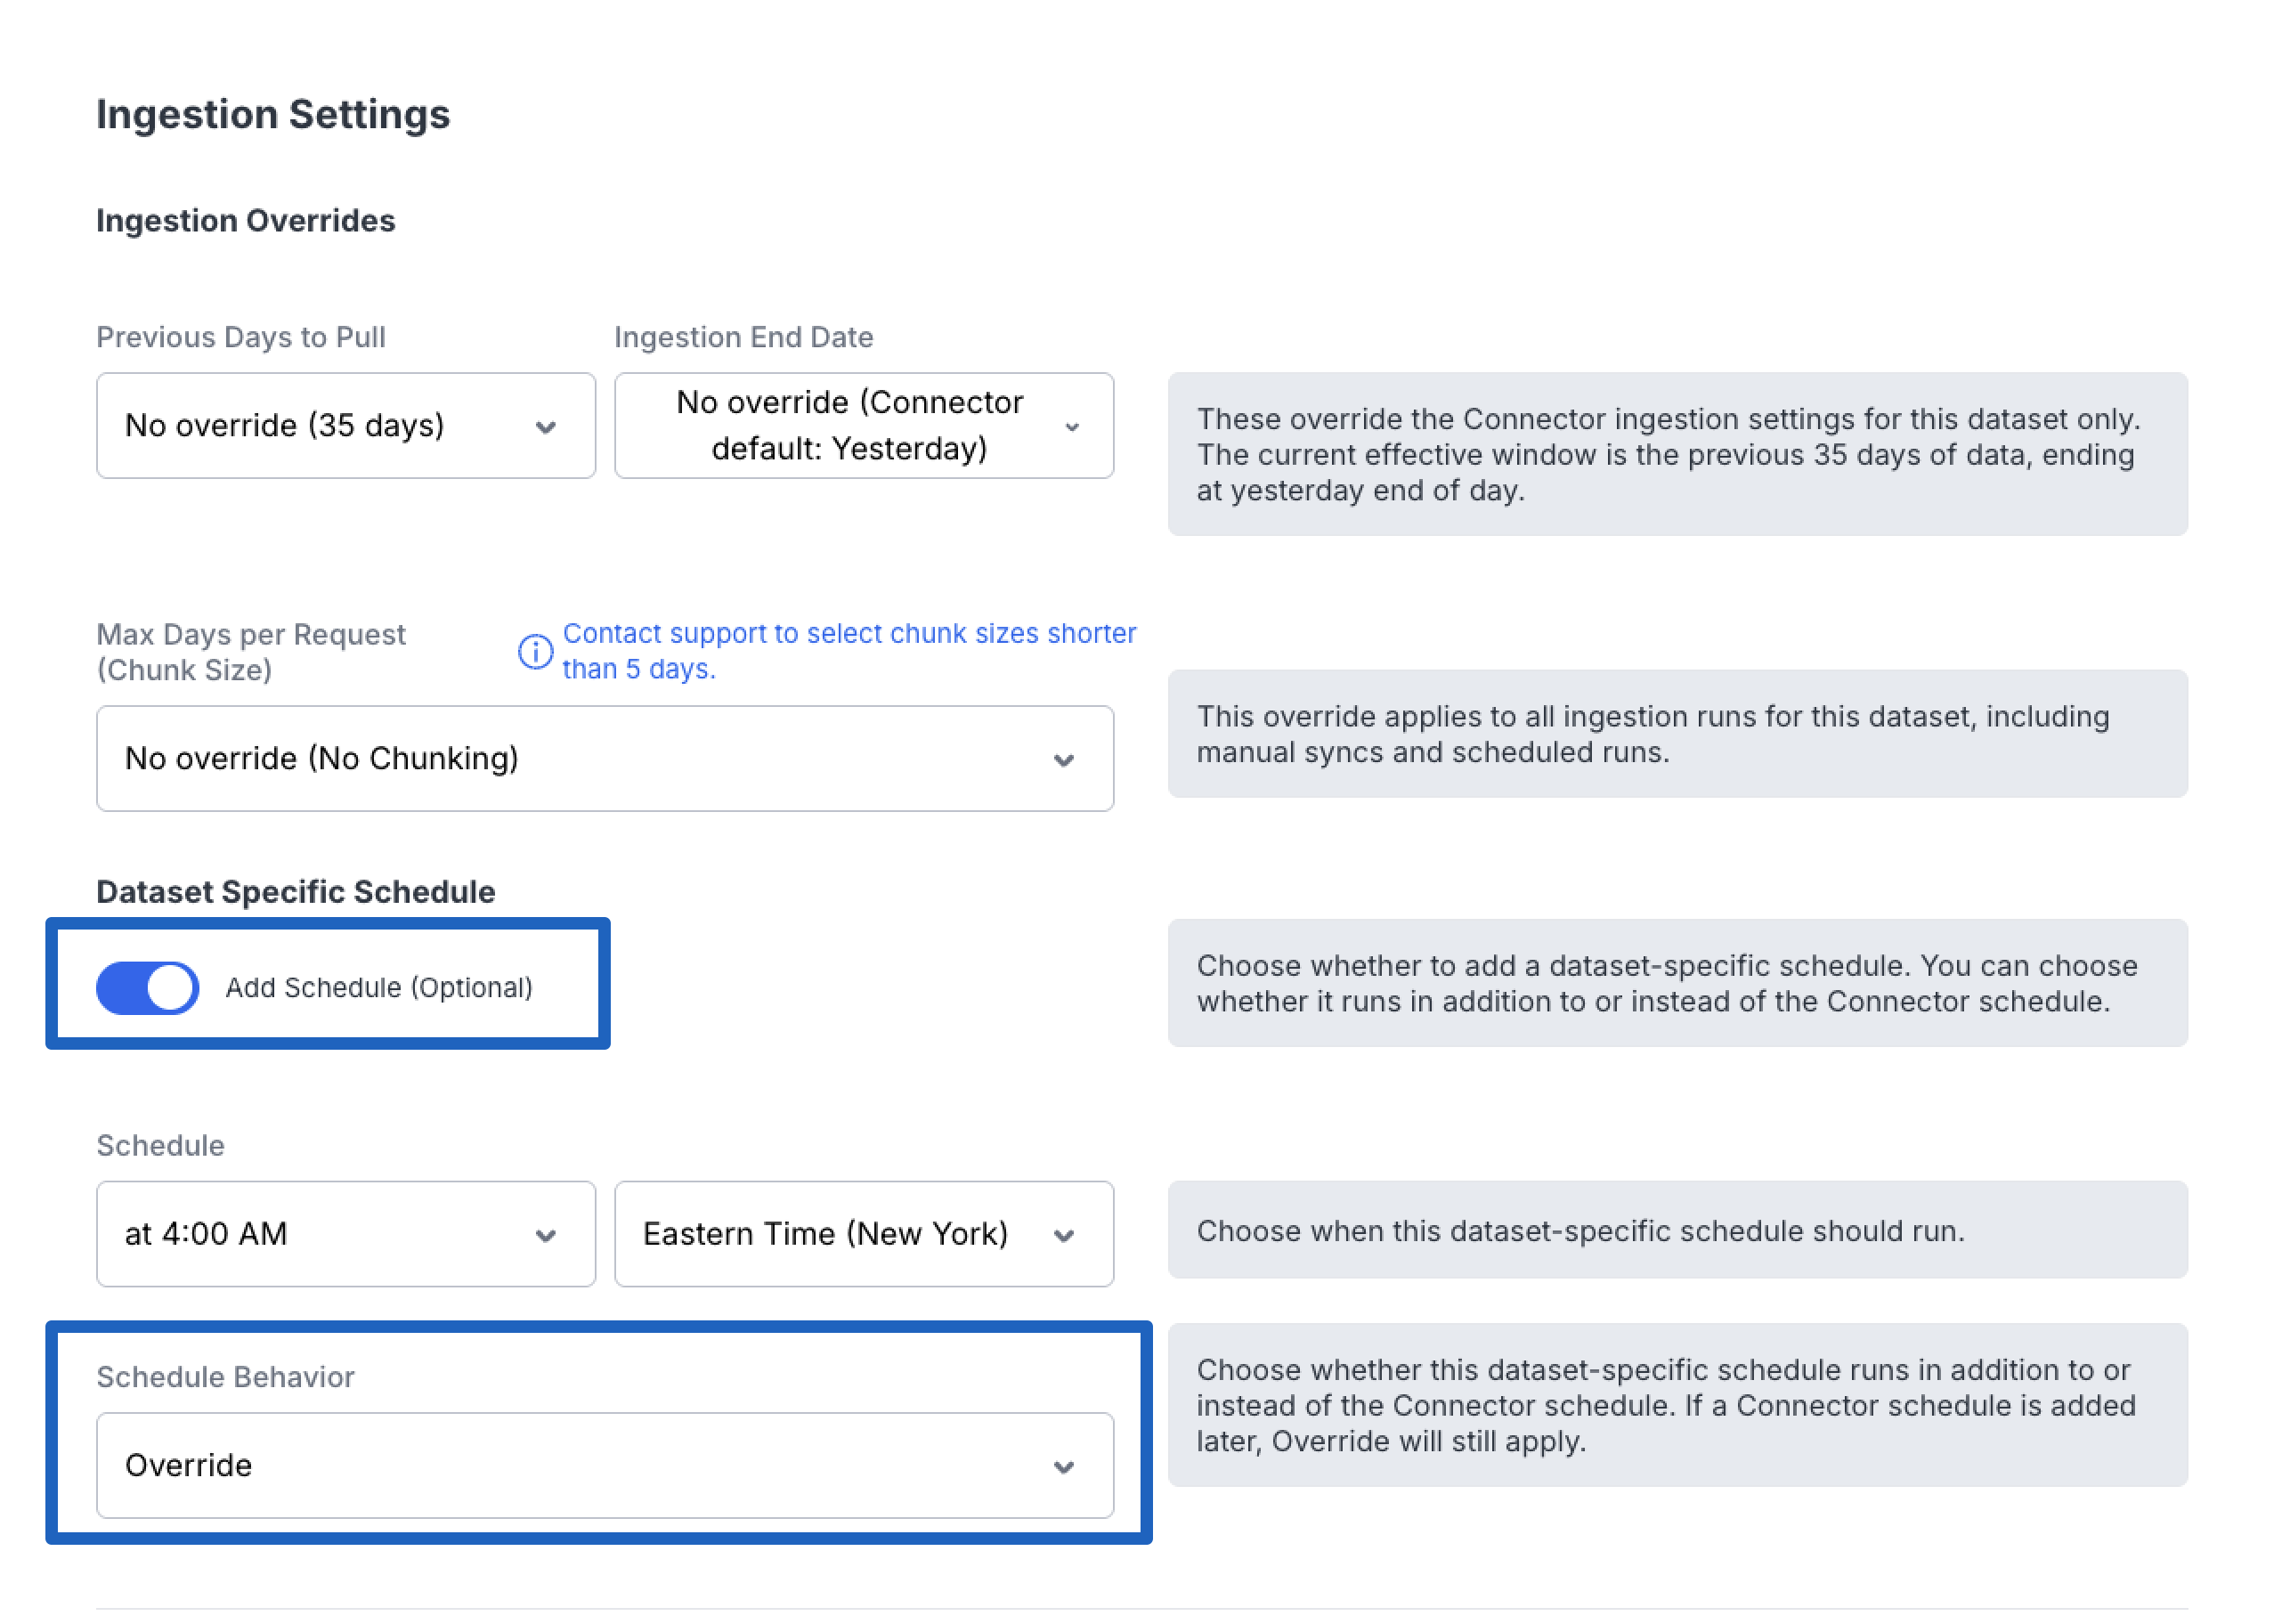
When to OverrideOverriding the connector schedule is useful when a dataset has unique timing requirements — for example, if it needs to sync at a different time of day or at a different frequency than other datasets on the same connector.
Sync schedule granularity: what you can and can't set
When you schedule dataset or connector syncs, scheduling is set at the level of a cadence (how often) or a specific hour in a chosen time zone — not down to a specific minute.
- You can choose how frequently a sync runs and, where an hour is selectable, which hour it runs in (in your selected time zone).
- You cannot schedule a sync to fire at a specific minute past the hour (for example, "run at 2:15" or "run at 2:45"). Scheduled syncs run at the top of the hour.
- If you need data to reflect a very specific minute-level timing, scheduling won't achieve that. Use the manual Sync Now control (see Managing Your Datasets in Data Cloud) when you need an on-demand refresh at a moment of your choosing.
Why minute-level scheduling isn't offeredSync schedules are designed around cadence and hour-level timing. There is no minute-level offset for scheduled syncs — a scheduled run always fires at the top of its scheduled hour.
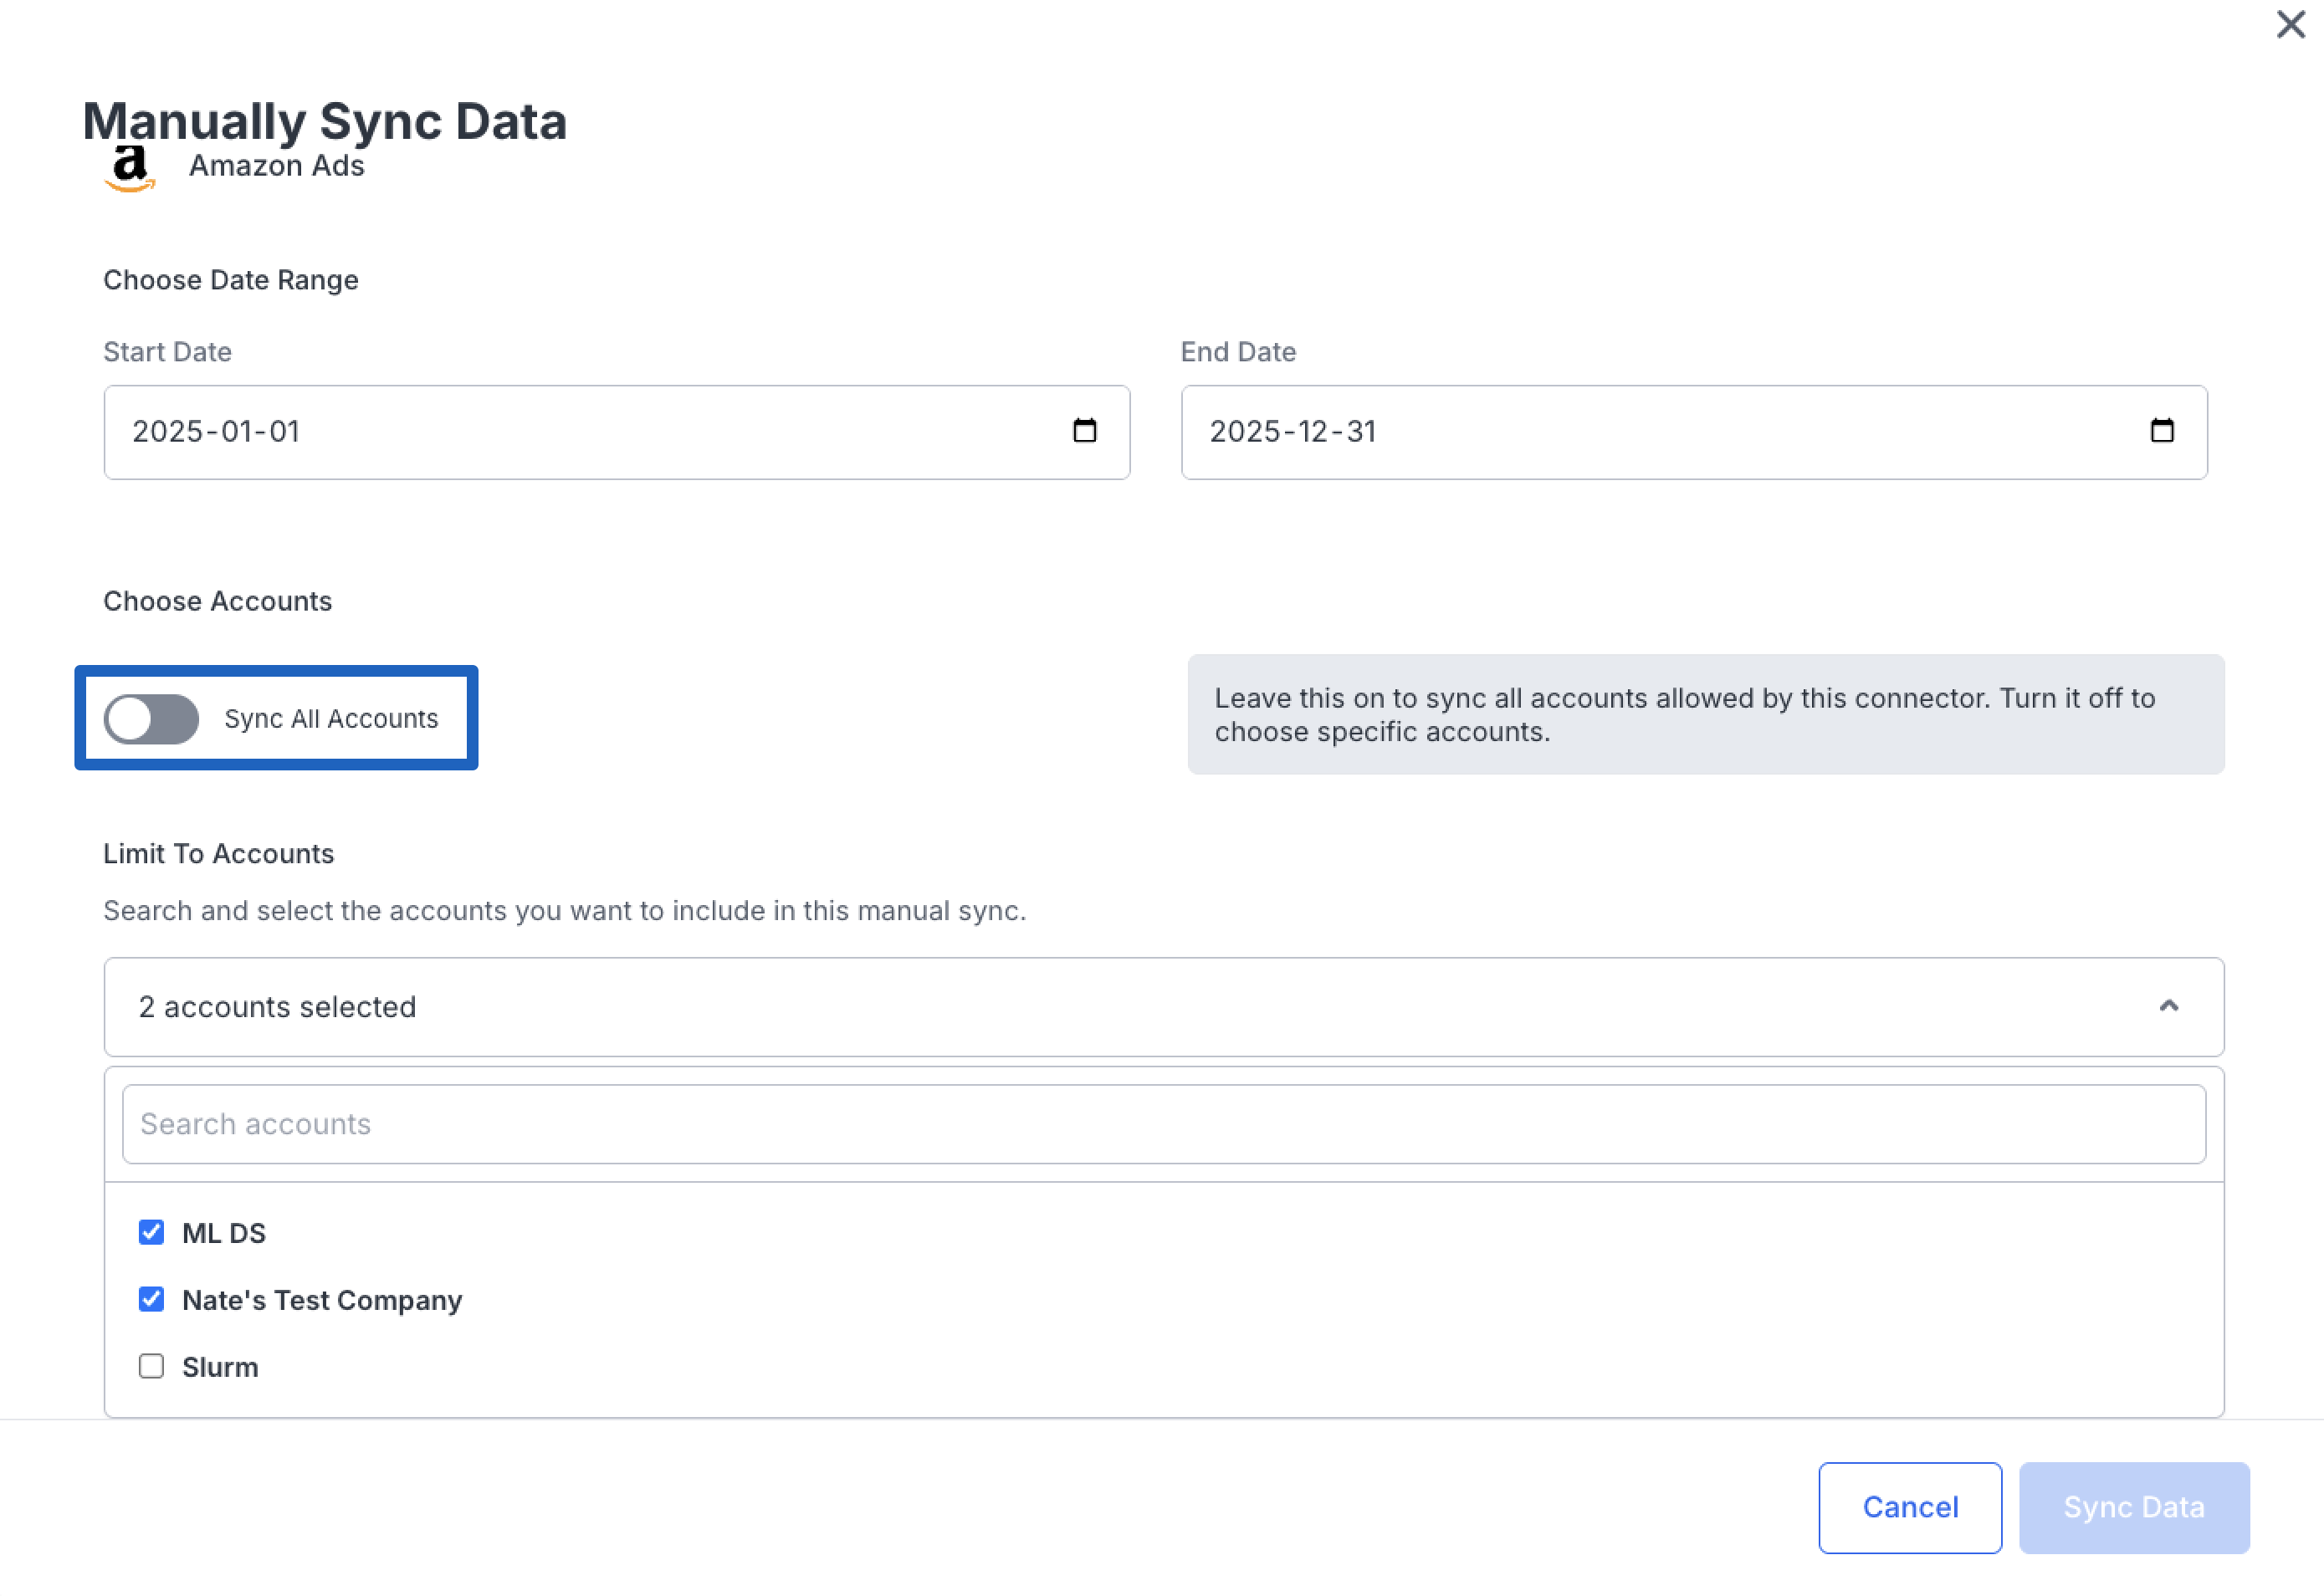
Targeted Manual Backfills
In addition to the existing manual sync functionality, you can now kick off a backfill for a specific date range targeting one or multiple accounts. This gives you more surgical control when you need to re-pull data for a particular period.
To run a targeted backfill:
- Navigate to Data Cloud → Connectors
- Locate the dataset you want to backfill
- Click the hamburger menu (⋮) on the dataset row
- Select "Manual Sync"
- Choose the date range for the backfill
- Untoggle the "Sync All Accounts" option
- Select the account(s) you want to target
- Click Sync to start the backfill
TipTargeted backfills are ideal for situations where you need to re-sync data for a specific time period — for example, after resolving a data discrepancy or when onboarding historical data for specific accounts.
Improved Setup Workflow for Custom Mapping Providers
For custom mapping providers — including Google Sheets, SQL, Email, and Snowflake Share — the setup flow has been reordered to make configuration more intuitive.
The Date & Account Matching step now comes before the Configure Columns step. This change helps reduce configuration errors by ensuring your date and account settings are established before column mapping begins.
Related Articles
Updated 2 days ago