
Connecting Snowflake to NinjaCat: Direct vs. Share
Connecting Snowflake to NinjaCat: Direct vs. Share
If you're a Snowflake customer and want to use your Snowflake data in NinjaCat, we support two ingestion methods: Snowflake Direct and Snowflake Share. Both require you to grant NinjaCat access to your Snowflake data, and in both cases you retain full ownership — you can revoke access at any time.
This article explains the difference between the two methods and helps you choose which is right for your data. Step-by-step setup instructions live in the linked companion articles.
Which method should I use?
We recommend Snowflake Direct for most customers. It's faster, simpler, and gives you near real-time access to your data with no duplication. No scheduled ingestion will run and data is available in the Ninjacat platform as soon as it is published. Choose Snowflake Share only when your data volume or query complexity makes direct querying impractical.
| Snowflake Direct (recommended) | Snowflake Share | |
|---|---|---|
| How it works | NinjaCat queries your Snowflake data directly via a pointer — no copy is made. | A daily query copies the latest data from your Snowflake account into NinjaCat's system. |
| Data freshness | Near real-time; queries only run on demand (Private Marketplace Listings may add a ~30-min delay due to regional data movement) | Up to ~24 hours old (refreshed daily), based on schedule. |
| Performance | Fast for most datasets. | Can be faster for very large or complex datasets that don't query efficiently in place. |
| Data storage | Data stays in your Snowflake account. | A copy lives in NinjaCat's system in addition to yours. |
| Best for | Most customers — straightforward datasets where freshness matters. | Very large or complex datasets where direct querying isn't performant. |
| Ownership & revocation | You own the data and can revoke access at any time. | You own the data and can revoke access at any time. |
| Status Monitoring | No refresh status is available, as no ingestion runs are processed. | Latest sync time is displayed and sync history is available in the sync history tab of the dataset details page. |
Snowflake allows private data sharing through two different mechanisms: Direct Shares or Private Marketplace Listings.
Note: Prior to sharing any data with NinjaCat over Snowflake share, make sure that any PII or sensitive content has either been excluded or masked.
Direct Shares
Direct shares are simple to create and manage, through either the Snowsight user interface or directly using SQL. However, they require that your account be in the same cloud platform and region as NinjaCat (AWS us-east-1/N Virginia).
Private Marketplace Listings
A Listing is essentially a wrapper around a data share, where Snowflake will take care of all the infrastructure required to deliver data across regions, removing the limitations of requiring your account to be in the same AWS region as NinjaCat.
Note: At this time, NinjaCat does not support cross-cloud data sharing through Listings. Please contact your NinjaCat account contact if you are not on an AWS hosted Snowflake account.

Creating a Snowflake Direct Share (Using Snowsight)
-
Customer must create a Direct Share in the account where their data resides.
Note: In order to perform this process you must have ACCOUNTADMIN permissions, or set up an appropriate role to be able to manage shares.
-
Log into your Snowflake account where data resides
-
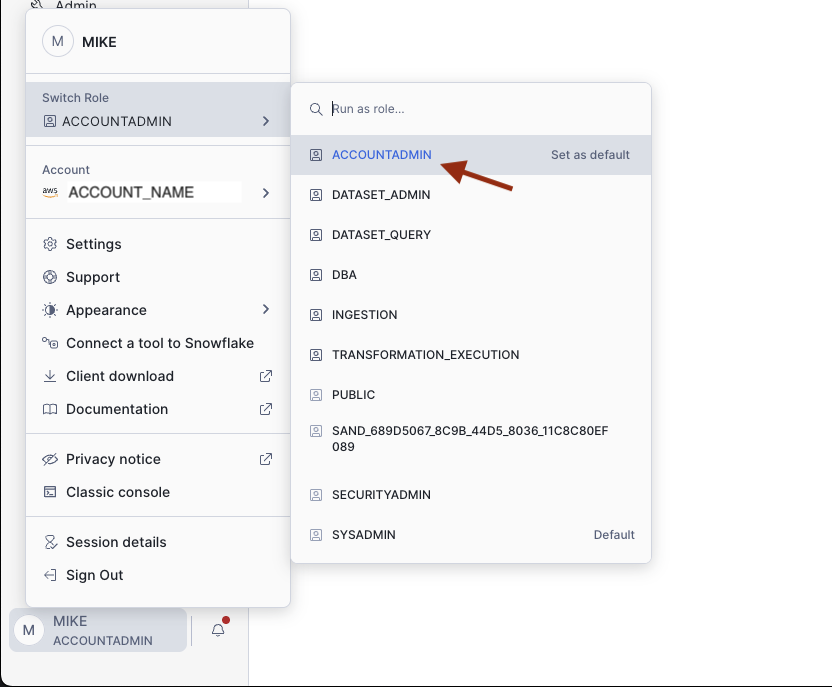
Set your current role to "ACCOUNTADMIN"
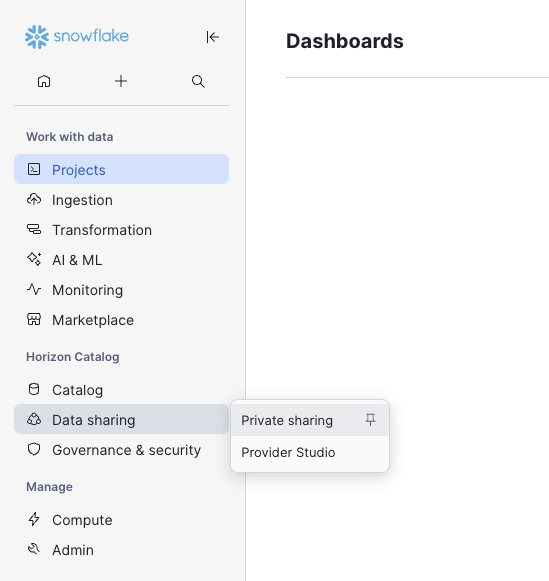
- From the main menu, select Data Sharing → Private Sharing


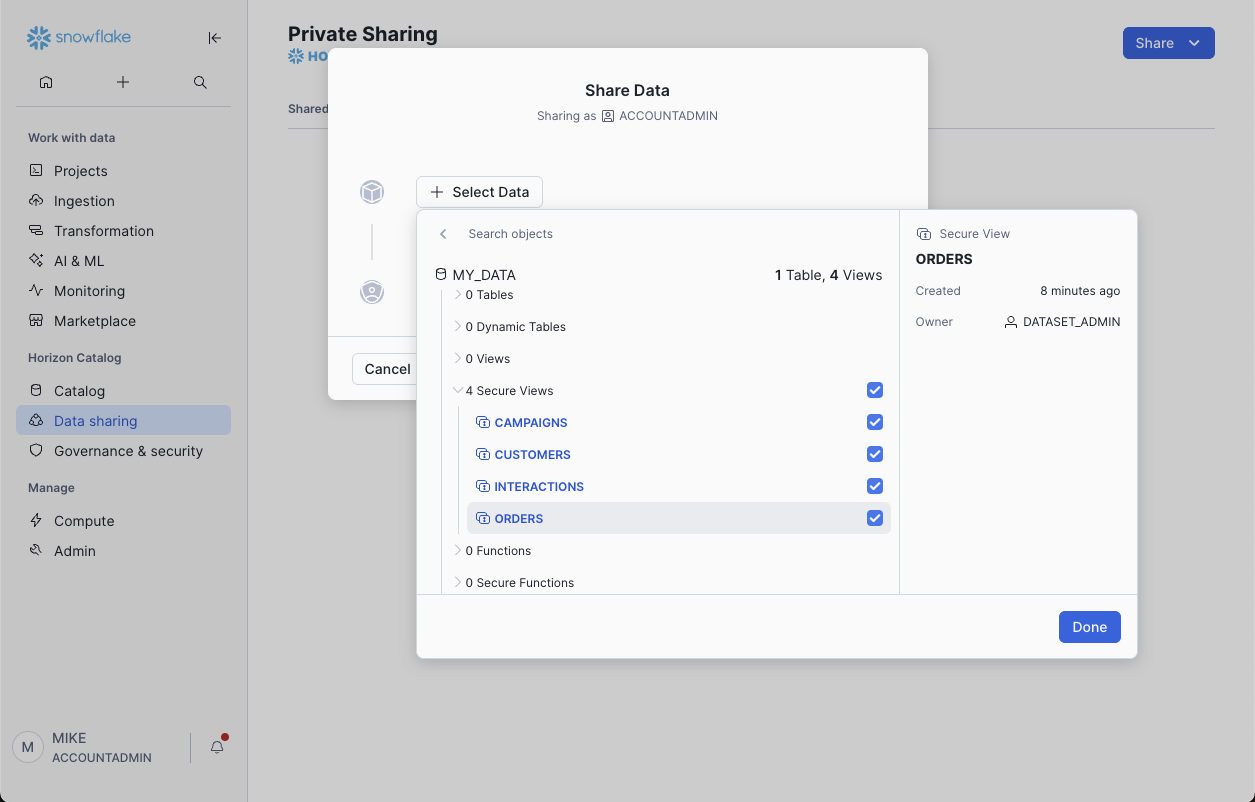
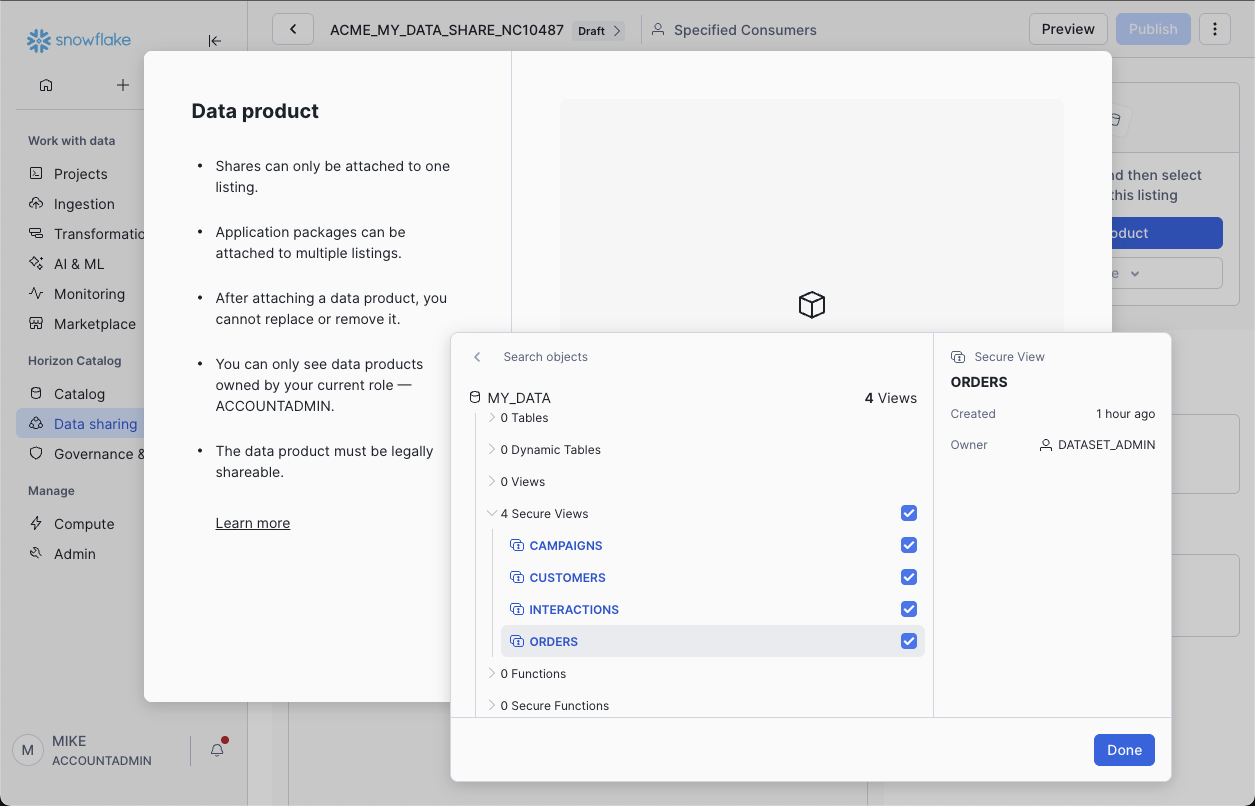
- Add the tables, views, secure views to the share
- After creating your Share, contact NinjaCat via the in-app Support Bot and let us know the name of the share. Our support staff will accept the share and complete the internal tasks required for you to set up the Snowflake Share or Snowflake Direct data connectors.
Creating a Private Listing
- Log in and set your role appropriately
- From the main menu, select Data Sharing → Private Sharing
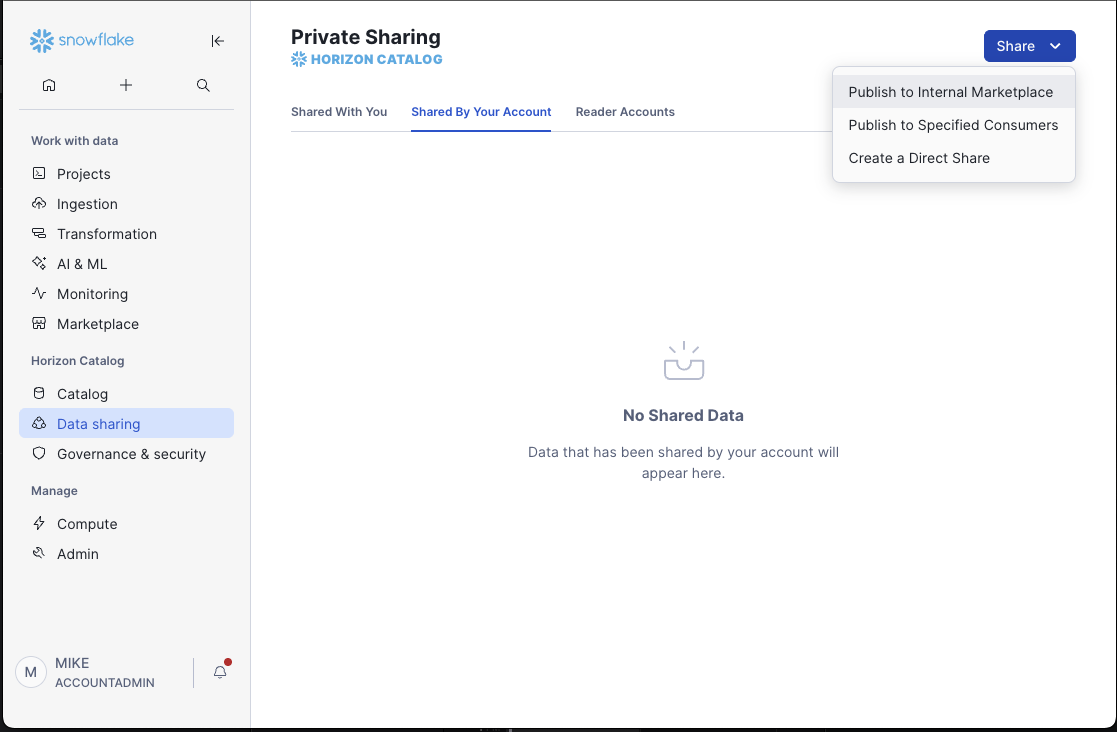
- Select "Publish to Specified Customers"
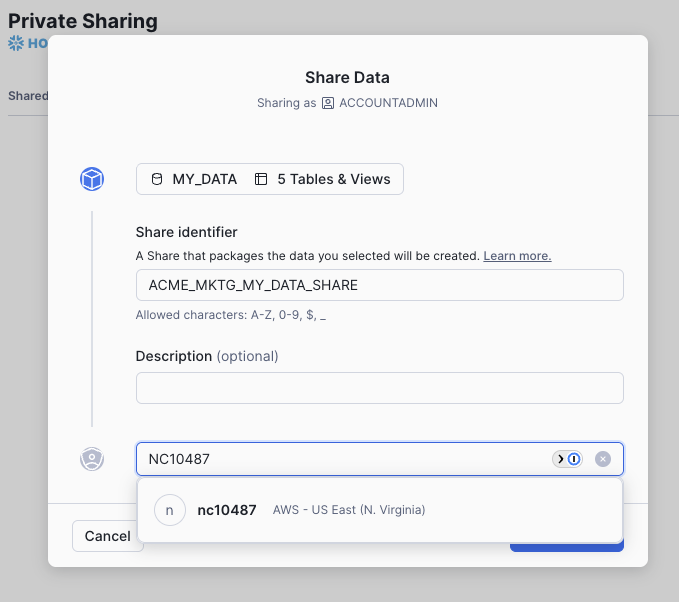
- Give your Listing an identifying name so it can be identified by us
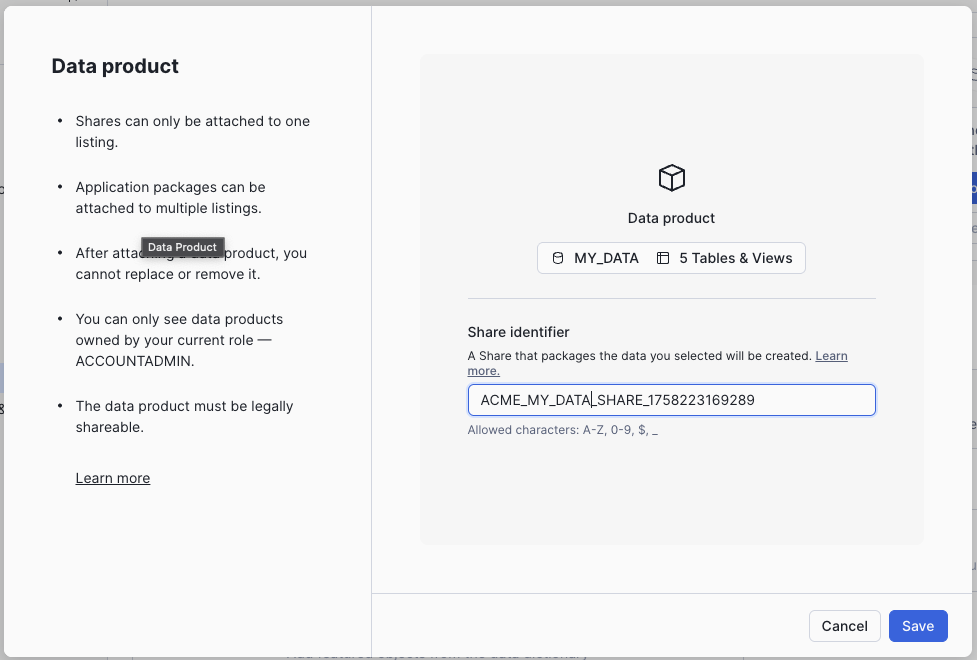
- Select the "Add Data Product" button and add the objects you want to share with us. After saving your selection, you will name the underlying data Share that is wrapped by the Listing
- You will be returned to the listing page after saving. Set the Access Type to "Free listing"
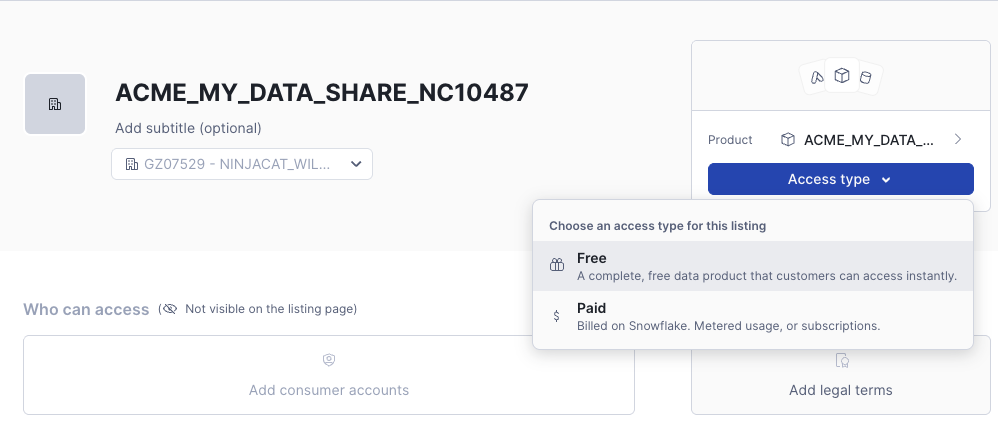
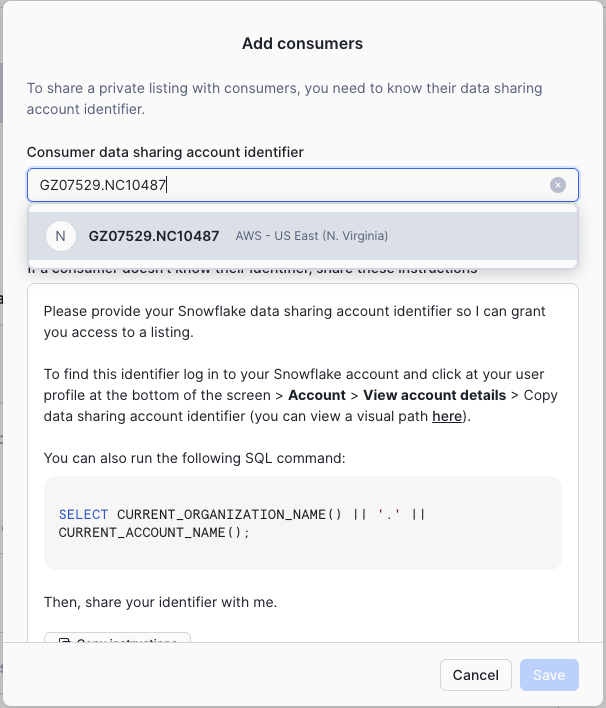
- Update the "Who can access" block, and add our share ID to the listing:
GZ07529.NC10487
Note: Once created, private listings can be found under Data Sharing → Provider Studio
- After creating your Share, contact NinjaCat via the in-app Support Bot and let us know the name of the share. Our support staff will accept the share and complete the internal tasks required for you to set up the Snowflake Share or Snowflake Direct data connectors.
Notes on Secure Views
Private sharing supports adding tables, views, or secure views.
Creating Shares with SQL
Creating Direct Shares with SQL is simple as well. Snowflake provides a great guide on how to complete this task.
If you need cross-region sharing, a direct share can be converted to a private listing.
Set up your data source
Once you've chosen a method, follow the setup steps in the matching article: