

Agent Builder Tour
Docs team note (AI-1320): The screenshot below (Agent_Builder_with_Bolder_Numbers_1-11.png) is stale. Item 8 has changed from "MCP Servers" to the unified "Connectors" section. Please replace this image with a new screenshot reflecting the updated General tab UI before merging this branch.
Before we dive into more detail of each section of the Agent Builder, let's start off with a brief tour to get the layout of the land.
Tab: Create - this is where you can collaborate with Agent Builder Bob to configure the Agent together

Tab: General - this is where the bulk of the configuration is done.
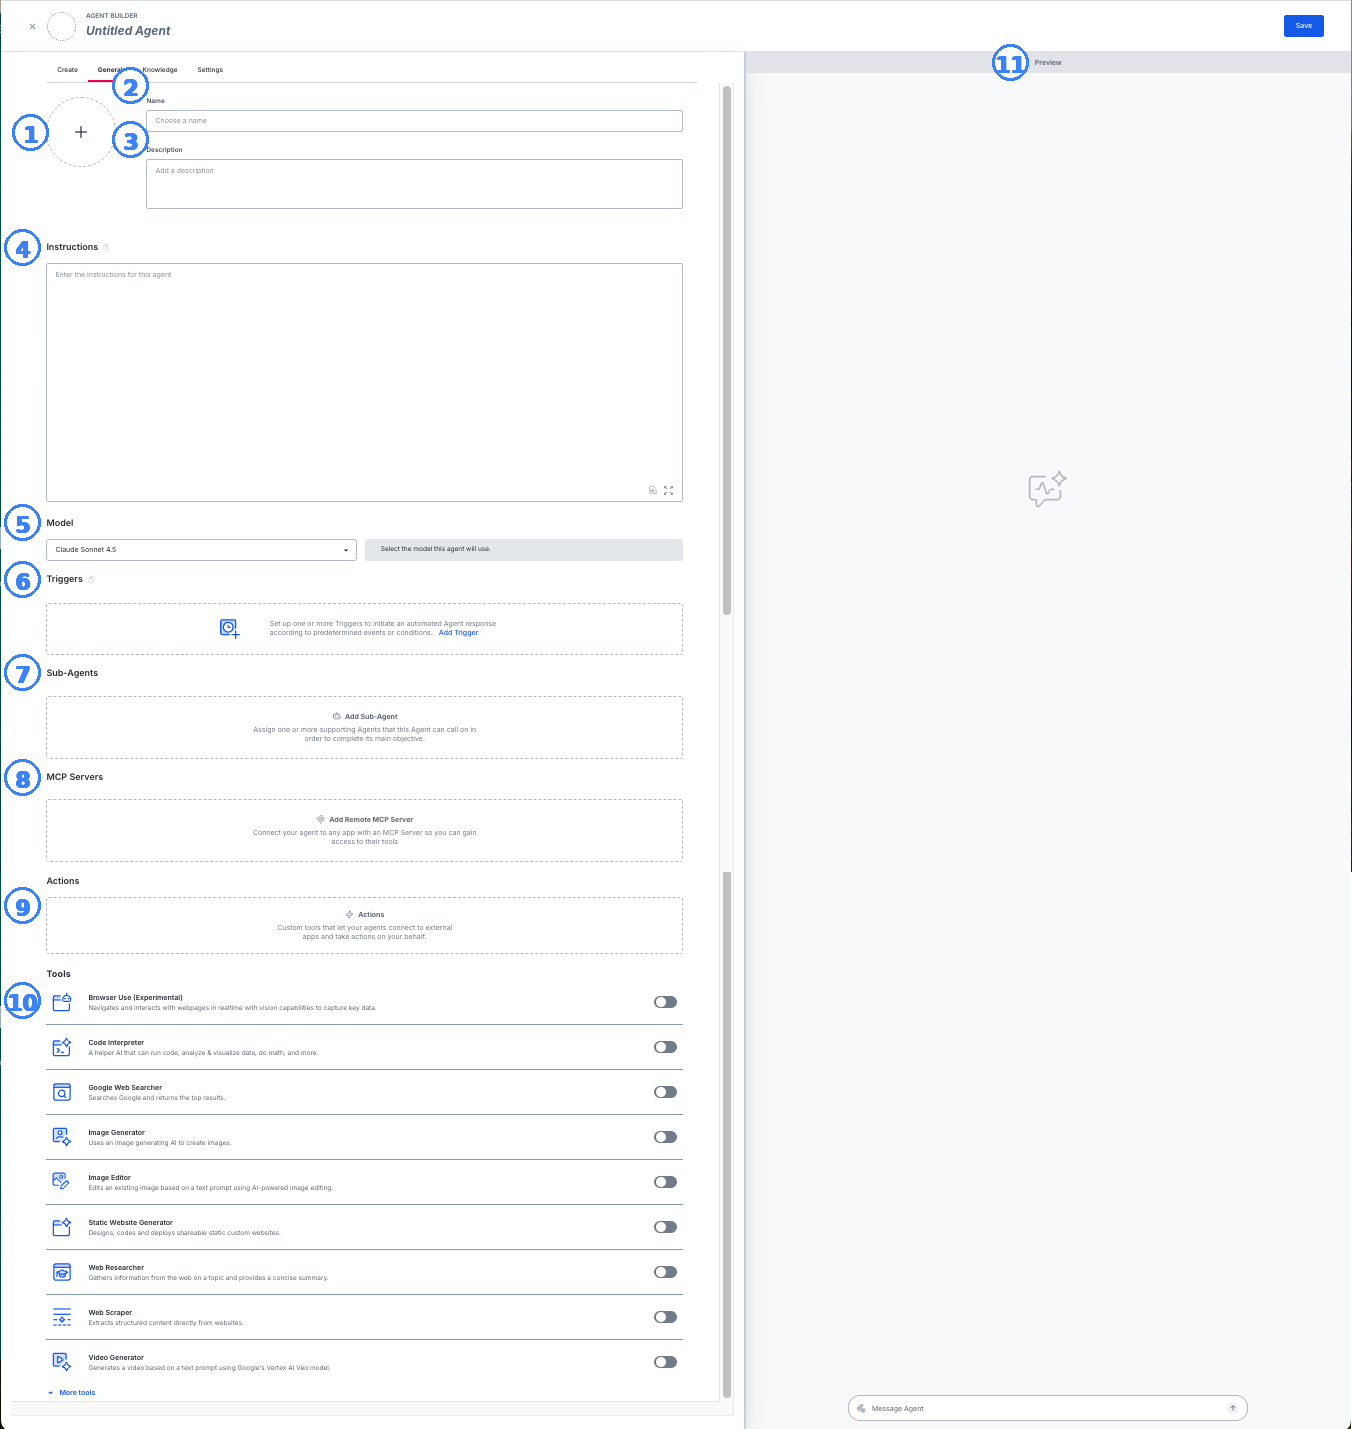
- 1. Generate a Profile Picture: Upload your own image or shuffle through AI-generated options to personalize your Agent's appearance.
- 2. Name: Unique identifier for your Agent that appears in the Agent Library.
- 3. Description: A brief summary of the Agent's role and goal, giving users a quick understanding of what it does.
- 4. Instructions: Otherwise known as the "prompt." Define how your Agent should behave, what tasks it should perform, and the type of responses it should generate.
- 5. Model: Select from available AI models to determine how your Agent processes and responds to inputs.
- 6. Triggers: Set up automations that allow the Agent to take action without human intervention.
- 7. Sub-Agents: Delegate specific tasks out to assigned subagents, who report back to your parent agent with the task at hand, allowing for a clean main context window, and additional context windows w/ your subagents.
- 8. Connectors: Add catalog connectors and MCP servers to your agent from one place. Click Add Connector to open a tabbed modal — choose a catalog connector in one tab, or add an MCP server (including a Custom MCP Server) in the other. Everything attached to the agent appears in a single list, with an MCP badge marking MCP entries so they're easy to spot.
- 9. Actions: Either work with Agent Builder Bob to create a net new Custom Action (another way for the agent to leverage external tools / perform external tasks) or add an existing one from the saved actions library.
- 10. Tools: Additional capabilities to allow the Agent to have in order to complete its task.
- 11. Preview: A quick way to test out the Agent that you're building with the settings applied so far.
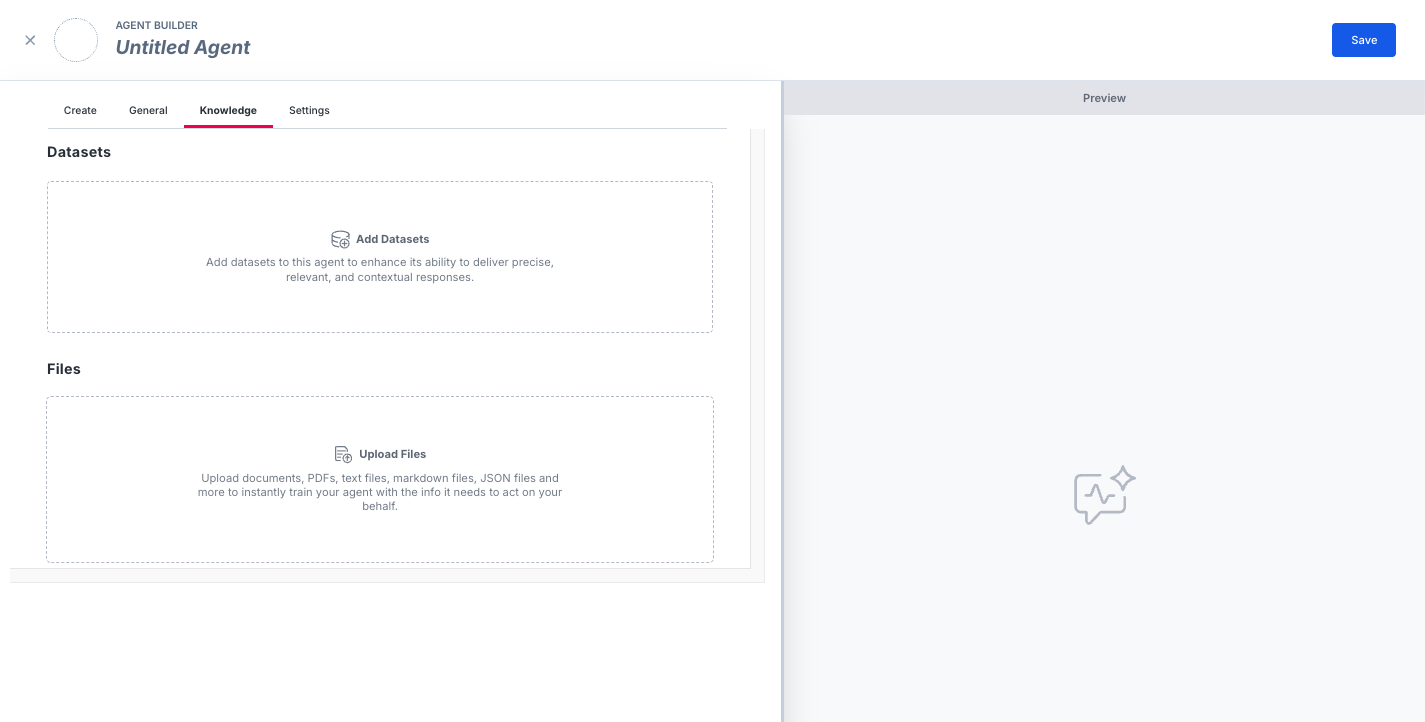
Tab: Knowledge - This is where relevant Datasets and/or Views and Files can be assigned to the Agent that it will need in order to complete its task/goal.
Manage Permissions - When creating a new agent, click the Manage Permissions button next to Save to control who in your organization (and which individual teammates) can access the agent. When editing an existing agent, you'll find Manage Permissions under the More Actions menu. Changes take effect once you click Apply.
For a full breakdown of permission levels, see Managing Agent-Level Access.